Adding fields to a content type
If you chose Save and Create Fields, you will continue on to Manage Fields page where you can determine what information you wish to collect or have your editors create. This creates a form which they can complete and when saved will display the information on your Backdrop site.
Existing fields
When we created the sample Content Type "My Contacts", two fields were automatically created for us: Full Name (Title) and Body. You will always get a Body text, but if you do not need it, you can delete it.
Add a new field
In the Add new field section, enter a label for the field. A machine name will be automatically generated from your chosen label. If you wish to modify the machine name, click "edit". In the Machine name field, enter the machine name for the field. You can only use numbers, lower-case letters and the underscore character (_).

In the field type list, select one of the following types:
- Boolean - has one of two values (for example: "yes/no" or "true/false" or "small/large")
- Date - a date
- Date (ISO format) - a date in ISO format
- Date (Unix timestamp) - a date in Unix timestamp format
- Email - an email address
- File - reference to a file (such as a PDF) on the Backdrop file system
- Image - reference to an image file such as GIF, JPG, PNG on the Backdrop file system
- Link - an internal path or an external URL
- List (float) - select from a drop-down list of floats
- List (integer) - select from a drop-down list of integers
- List (text) - select from a list of text options (which can be formatted as either a drop-down list or checkboxes)
- Number (decimal) - a number that allows exact decimal values; often used for price or cost (such as $199.99)
- Number (float) - a number that can use decimals, such as 0.0123456789
- Number (integer) - a whole number, such as a year (e.g. 2012) or value (e.g. 1, 2, 5, 305); it does not allow decimals.
- Term reference - reference id to an existing Taxonomy Term (or tag)
- Text (long with summary) - same as long text, but with an additional summary text
- Text (long) - long, multi-line alphanumeric text such as a biography
- Text (short) - short text such as a name (limited to 255 characters)
Select widget
In the Widget field, select a widget. The options vary depending on the field type.
Click Save.
Once you have saved, you will be given options for the field you have created. In this case, we have a field named "Address" that we want to give some parameters to.
Maximum Length
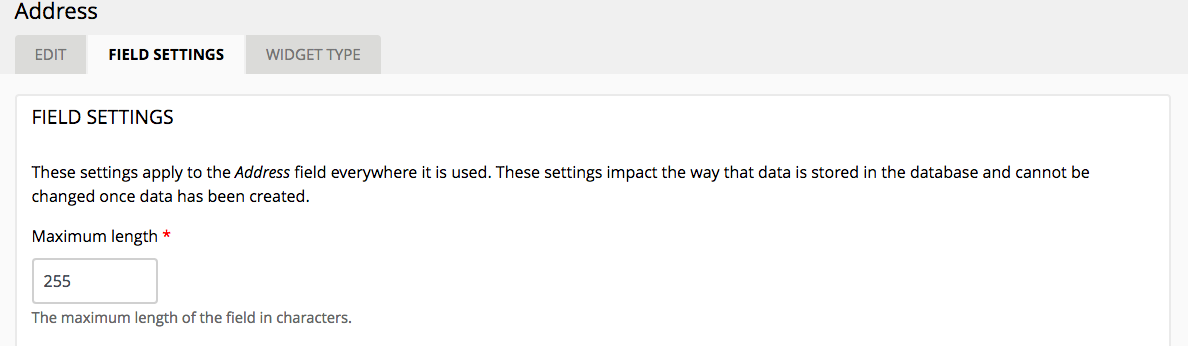
The first option will be for how many characters you will give the user to complete the field. The default, in this case, is 255 characters.
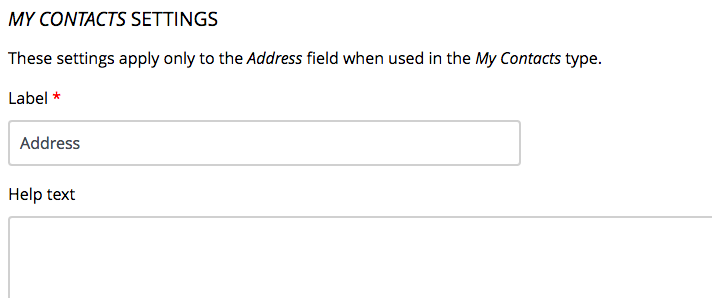
Once you click Save Field Settings, you are presenting with other settings for the Address field to include Help Text (instructions for the user),
whether you want it to be a Required Field,

the Size of the Textfield,

how it should be Processed (TextFilteredered HTML)

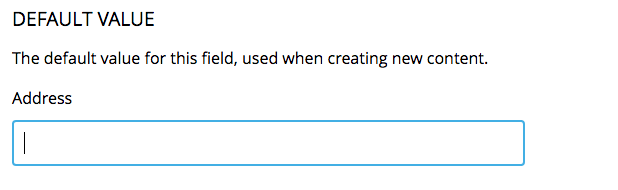
and if there needs to be a Default Value.
When you are finished with your values, select Save Settings to return to the Manage Fields screen.
Now you can continue adding other fields such as Telephone as shown below and continue adding all the fields for information you need to collect:

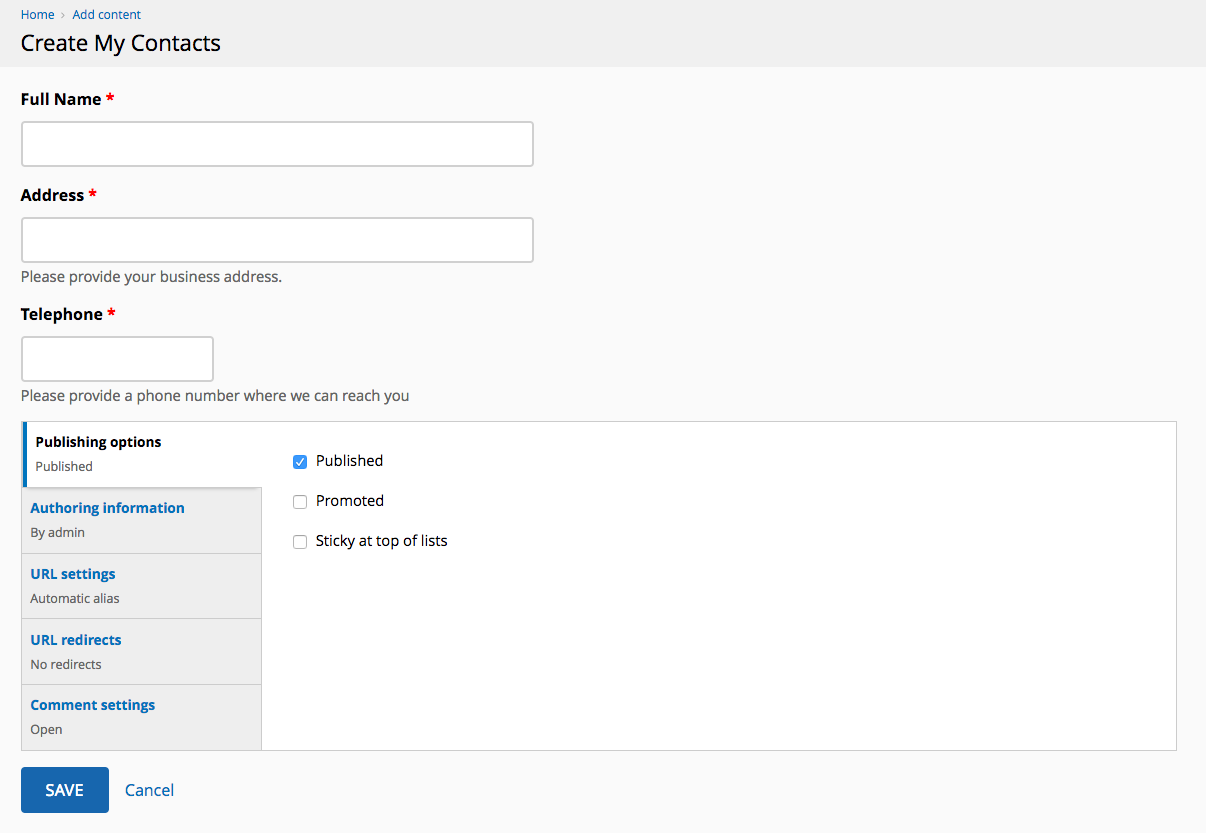
Once completed, the content type "My Contacts" would look like this: